Growing, Curing and Storing Garlic in 3 Easy Steps
Disclosure: Some of the links in this article may be affiliate links, which can provide compensation to me at no cost to you if you decide to purchase. As an amazon associate I may earn on qualifying purchases.
Growing, Curing, and Storing Garlic in 3 Easy Steps
Growing your own garlic can be a rewarding experience, offering you a fresh supply of garlic for your recipes for up to 9 months.
Here's a simplified guide to growing, curing, and storing garlic effectively, with insights from various extension agencies.
Pruning Shears recommended for preparing Garlic for storage:
Felco F-6 or Fiskars from Amazon
Step 1: Growing Garlic
Choose the Right Variety:
Hardneck garlic: Ideal for cooler climates, it has a strong flavor and produces a flower stalk (scape). Popular varieties include Rocambole and Purple Stripe.
Softneck garlic: Best for warmer climates, it has a milder flavor and does not produce a scape. Common varieties include Silverskin and Artichoke.
Planting Time:
Plant garlic in the fall, about 4-6 weeks before the ground freezes. This allows the cloves to establish roots before winter .
Use seed garlic that is free from disease. This is what I bought:
Site Preparation and Planting:
Choose a sunny location with well-drained, loamy soil with a pH between 6.0 and 7.0 .
Take the bulb apart and plant the healthy cloves from disease-free bulbs about 2-3 inches deep with the pointed end up. Space them 4-6 inches apart in rows 12-18 inches apart.
Cover the garlic bed with a 3-4 inch layer of mulch (straw or leaves) to protect against cold temperatures and suppress weeds .

Care and Maintenance
Watering: Keep the soil consistently moist but not waterlogged. Reduce watering as the bulbs mature, especially in the last few weeks before harvest .
Fertilizing: Apply a balanced fertilizer or compost at planting and again in the spring when growth resumes .
Weeding: Keep the garlic bed weed-free to prevent competition for nutrients and water .

Step 2: Curing Garlic
Harvest Timing:
Garlic is ready to harvest in mid-summer when the lower leaves begin to yellow and dry. I harvest when there is about 5 leaves from the bottom that are yellow. Test by digging up a bulb and checking its size. If the cloves are well-formed and the skin is thick and papery, it's time to harvest .
Harvesting and curing onions is a very similar process. Click here to learn
Cleaning and Drying:
Shake excess soil from the bulbs without removing the outer layers of skin. Keep some soil on the bulb to aid with drying.
Hang the garlic in bundles or spread it out in a single layer on a mesh surface in a well-ventilated, dry, hot, and shady area. Ensure good air circulation to prevent mold. I place mine in my greenhouse in the shade with a fan on low blowing on them.
Allow the garlic to cure for 2-4 weeks. The outer skin will become papery, and the necks will dry out completely .
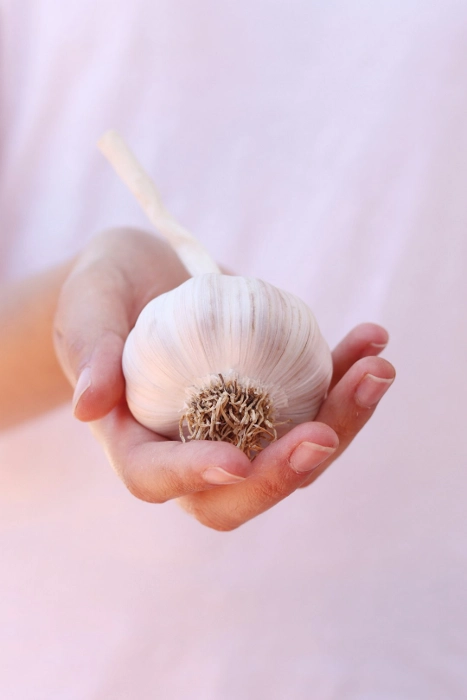
Trimming:
Once cured, trim the roots, brush the remaining soil off, and cut the stalks about 1-2 inches above the bulb.
Step 3: Storing Garlic
Storage Tips
Optimal Conditions:
Store garlic in a cool, dark, and dry place with good air circulation. Ideal storage temperatures are between 50-60°F for a couple months. Any cool, well-ventilated place will do for storage through the winter months.
In very cold areas the bulbs should be protected from freezing. According to OSU Extension service, the ideal storage temperature is 32°–38°F at less than 70% humidity for storage up to 9 months.
Garlic will sprout fastest between 40°–60°F. Basements and refrigerators are not ideal because they are often too humid, which can cause garlic to sprout prematurely or become moldy .
Storage Containers:
Use mesh bags, paper bags, or baskets to store garlic. Avoid plastic bags as they can trap moisture and lead to rot .

Whole Bulb Storage:
Store garlic as whole bulbs rather than separating the cloves. Whole bulbs retain their integrity and help preserve the cloves inside. Separated cloves are more susceptible to moisture and decay .
Regular Monitoring:
Regularly check stored garlic for signs of sprouting or rot and remove any affected bulbs promptly .
Additional Tips for Success
Crop Rotation: Avoid planting garlic in the same spot each year to prevent soil-borne diseases. Rotate with non-allium crops .
Pest Control: Watch for pests like onion maggots and nematodes. Use row covers and practice good garden hygiene to minimize risks .
Garlic Scapes: If growing hardneck garlic, harvest the scapes (flower stalks) when they start to curl. They are edible and can be used in various dishes .
With these easy steps for planting, curing, and storing, you'll enjoy the bounty of your labor in the kitchen and beyond.
Happy gardening!
Related Articles:
Exploring The Best Long Handled Pruners for Senior Gardeners
The Ultimate Guide for Choosing The Best Shovels for Yard Work or Gardening
5 Tips for Saving Flowers Seeds
Best Bulb Planting Tools for Seniors
Drying Fresh Basil: Simple Methods for Preserving Flavor
When to Pick, Harvest and Store Onions
How to Choose the Best Cooling Sun Hat for Gardening
Pain Free Gardening: The Best Seats, Stools and Garden Carts
Disclosure: Some of the links in this article may be affiliate links, which can provide compensation to me at no cost to you if you decide to purchase. As an amazon associate I may earn on qualifying purchases.